How the RateRun Timer Works: Track Time, Bill Clients, Get Paid
The timer is at the heart of RateRun. It is how you turn hours into money — whether you are billing by the hour, tracking time for your own records, or building up sessions to invoice later.
Here is everything it does and how to get the most out of it.
Starting a session
The timer lives in the right sidebar on desktop, or as a compact bar at the bottom of the screen on mobile. To start tracking, pick your client and project from the dropdowns, confirm your hourly rate, and hit Start.
Once running, you will see two numbers ticking up in real time: the elapsed time and your earnings. It is a surprisingly motivating thing to watch your money counter go up while you work.
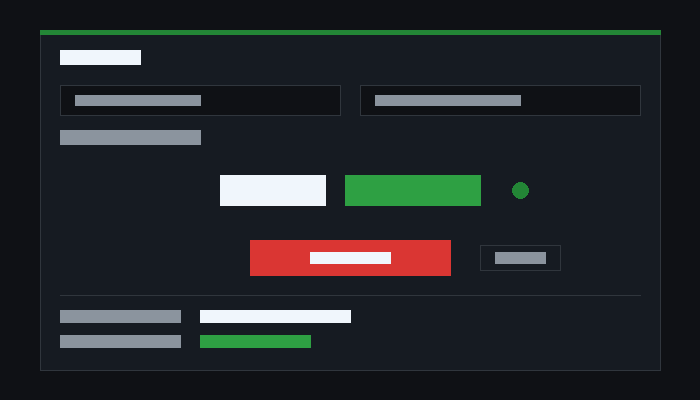
When you are done, hit Stop. The session gets saved to your Timer Sessions history with the client, project, duration, and amount earned.
Manual time entry
Forgot to start the timer? It happens. You can add sessions manually by entering the date, start time, end time, and project. RateRun calculates the duration and earnings automatically based on your hourly rate.
Manual entries show up in your history alongside live-tracked sessions — there is no difference in how they are treated when it comes to invoicing or reporting.
Picture-in-Picture mode
This one is a favourite. The PiP button floats a small timer window on top of whatever else you are doing — your browser, your code editor, Figma, whatever. You can see your time and earnings without switching back to RateRun.
It is especially useful on mobile where screen space is limited. Start the timer, minimise the app, and the PiP overlay stays visible.
Ready to track your first session?
Reviewing your sessions
Every tracked session is stored in the Timer Sessions page. You can filter by client, project, date range, and billing status (billed or unbilled). It is the quickest way to answer “how many hours did I spend on this project last week?”
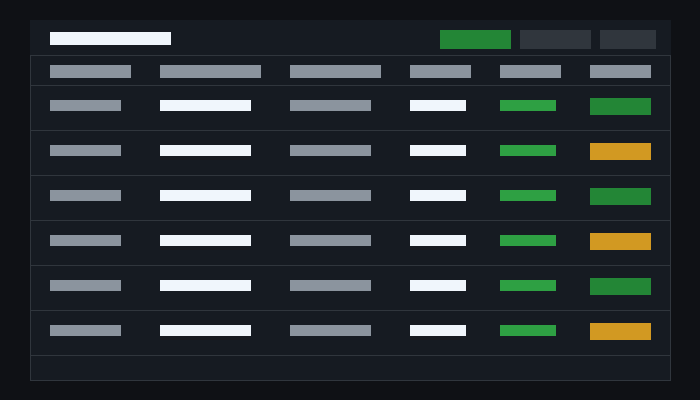
Each session shows the client name, project, duration, hourly rate, and total earned. Sessions are marked as unbilled by default and switch to billed once they are pulled into an invoice.
From timer to invoice
This is where the timer really pays off. When you are ready to bill a client, head to Invoices and choose Unbilled Time. RateRun pulls in all your unbilled sessions for that client, calculates the total, and builds the invoice for you.
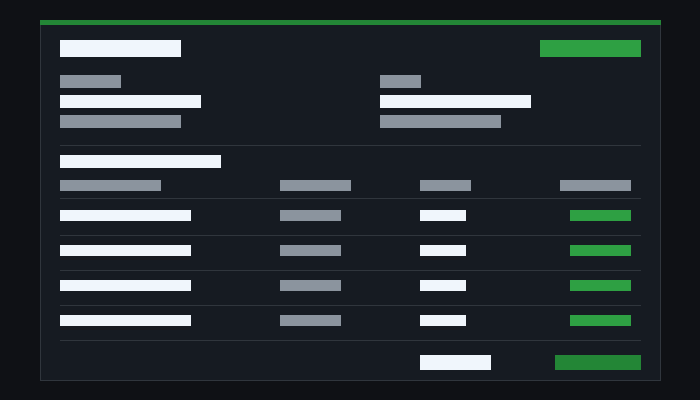
No copying numbers between apps. No manual totalling. Track your time, hit invoice, send it. That is the whole workflow.
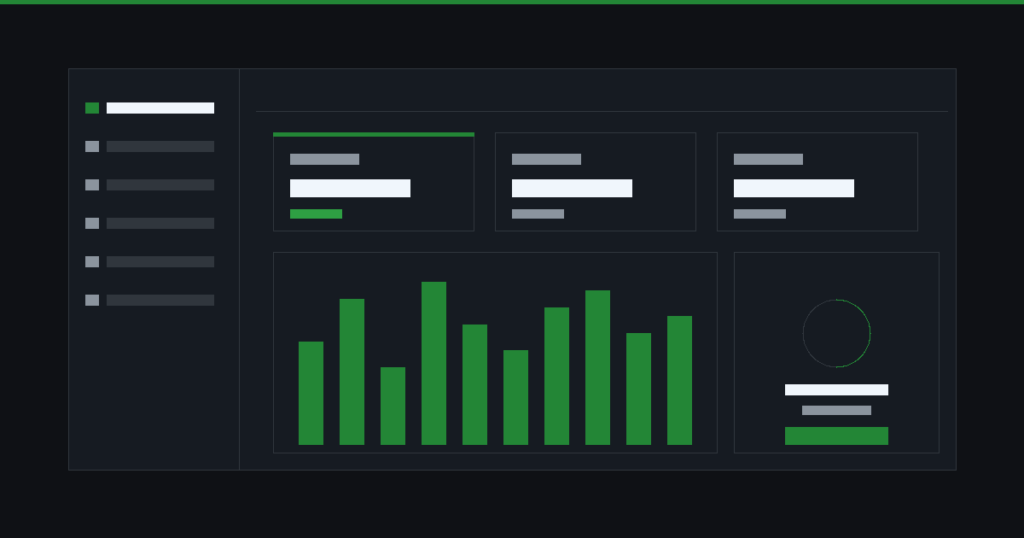
Your dashboard ties it all together
Everything the timer records feeds into your Dashboard — hours worked today, billable value, income received. You can switch between daily, weekly, monthly, and yearly views to see how your earnings are trending.
The daily progress ring gives you a quick visual of how your day is going. Combined with the timer, it turns RateRun into a motivation tool as much as a tracking tool.
See how it all connects
Timer, invoices, dashboard — one place for everything.